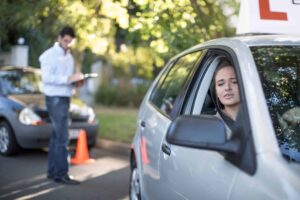
So, you are about to take your G2 road test in Ontario. Maybe you booked it weeks ago and now the date is creeping closer. Maybe you just booked it last night in a rush of excitement and reality is starting to hit. Wherever you are in the process, one thing is certain: the G2 test feels huge.
It is the first time you will drive alone if you pass. No parent watching, no instructor sitting beside you, no one to correct mistakes in the moment. Just you, the car, and the road. If you are looking for a simple G2 road test checklist to keep you grounded, you are in the right place.
That can be exciting, but let us be real, it is also terrifying for many new drivers. I remember my own G2 test day. I barely slept, woke up too early, stared at the ceiling wondering if I even remembered how to signal left. By the time I sat in the driver’s seat with the examiner next to me, I was shaking so much I almost dropped the keys. And yet, somehow, I passed. Not because I was perfect, but because I was safe. That is the lesson you need to take away.
This G2 road test checklist is not just a dry list of rules. It is a guide filled with stories, practical tips, mistakes to avoid, and all the small details people forget until it is too late. Think of it like a friend walking you through the process, step by step.
What the G2 Test is Really About
The G2 test is not about being flawless. It is about being safe and trustworthy behind the wheel. The examiner is asking one big question the entire time: would I feel comfortable letting this person drive on their own? If the answer is yes, you pass. If the answer is no, you fail.
That is why small mistakes like checking your mirror twice or braking a little too firmly usually do not matter. They care about the big safety stuff. Rolling through stop signs, forgetting to check blind spots, speeding, cutting people off, or running a red. Those are the things that kill your chances.
Must Check: How Many Mistakes Are Allowed in G2 Test Ontario
G2 Road Test Checklist
Getting ready for your G2 road test? A little preparation goes a long way. Here’s a quick checklist to make sure you have everything you need before the big day.
Step One: The Preparation Before Test Day
Everyone knows you need your G1 license. But the real preparation goes deeper.
Documents You Need
- Your actual G1 license card. Not a photo on your phone. Not a photocopy. The real one.
- Your booking confirmation. It can be on your phone or printed.
- Glasses or contacts if your license says you need corrective lenses.
You would be shocked how many people forget one of these. A friend of mine once forgot her G1 card at home and the examiner said, “Sorry, no license, no test.” She had to rebook and wait another month.
The Vehicle You Are Using
You can use your own car, borrow a parent’s, or use a driving school vehicle. But whichever car you bring, it must pass a safety check before the examiner even gets inside. That means:
- All lights must work. Headlights, brake lights, turn signals, and hazards.
- The horn must work.
- The tires must not be bald.
- The windshield wipers must function with washer fluid topped up.
- The brakes must feel firm and responsive.
- There must be no warning lights on the dashboard.
Examiners turn people away every single day for failing this check. I once watched a teenager show up in his dad’s old car. The left signal light was burnt out. The examiner had him test it, shook her head, and said, “Sorry, we cannot continue.” Imagine waiting months for your test, only to be stopped before leaving the parking lot. Check everything the night before.
Practice Properly
There is practice, and then there is smart practice. In the week before your test, drive daily if you can. Do not just cruise around. Practice the exact maneuvers they will test you on.
- Full stops at stop signs. Count to three in your head.
- Lane changes. Check mirror, signal, shoulder check, glide smoothly.
- Parking. Parallel, uphill, downhill, and three point turns.
- Busy intersections. Left turns, yellow lights, right on red.
- Highway merging if your centre requires it.
If you are with an MTO Approved Driving School in Toronto, ask for a mock test. Instructors often know the quirks of each test centre. At Downsview, they may emphasize lane changes. At Etobicoke, expect a highway merge. At Metro East, they love to test your parallel parking. Knowing this in advance makes a big difference.
Step Two: The Morning of the Test
Nerves peak here. You cannot avoid it, but you can manage it.
Sleep and Food
Do not stay up all night cramming rules. If you do not know them by then, you will not learn them at 2 a.m. Go to bed early, get a solid rest, and wake up calm. Eat something light in the morning. Driving hungry makes you jittery. Driving too full makes you sluggish.
Clothing and Footwear
Comfort is key. Wear sneakers or flat shoes with grip. Do not wear flip flops, high heels, or heavy boots. Clothes should be comfortable and allow easy movement.
Arrive Early
Plan to arrive at least 30 minutes early. This gives you time to park, breathe, and observe. Watching other students take their test can calm your nerves. You will see the routes they drive and sometimes notice what gets them in trouble.
Step Three: The Flow of the Test
The test usually lasts 20 to 30 minutes. Here is what happens.
Meeting the Examiner: They check your ID, confirm your car, and explain what will happen.
Car Safety Check: They will ask you to test lights, signals, horn, and brakes. If something fails, the test is cancelled.
The Driving Portion: This is the main event. They will test:
- Smooth starts and stops.
- Left and right turns.
- Stop signs and traffic lights.
- Lane changes with full checks.
- Residential driving at 40 km/h.
- Parking maneuvers.
- Three point turns.
- Highway merging if your centre includes it.
Returning to the Centre: They will ask you to park. Do it smoothly, shut off the car, and breathe.
Must Check: How to Pass the G2 Driving Test in Ontario
Step Four: Common Mistakes That Fail Students
Here are the big ones:
- Rolling stops. Always stop fully.
- Forgetting shoulder checks. Examiners watch for this like hawks.
- Speeding or driving far too slowly. Both are unsafe.
- Forgetting to signal.
- Dangerous hesitation. Sitting too long at a green or blocking traffic.
- Cutting off pedestrians.
Smaller mistakes like signaling too early, braking a little hard, or checking mirrors too often are fine. Big safety issues are what cause failures.
Step Five: After the Test
If you pass, congratulations. You get a temporary license on paper and your actual G2 card in the mail. If you fail, do not panic. Many people fail the first time. The examiner gives you feedback. Use it, practice, and book again. You can rebook after 10 days.
Comparing Ontario Test Centres
This is something many learners wonder about. Which test centre is easier? The truth is, none of them are easy, but they have different challenges.
- Etobicoke: Known for highway testing. If merging onto the 401 makes your knees shake, this is tough. But some say it is easier once you are on the highway because there are fewer pedestrians and stop signs.
- Downsview: A balanced mix. You will likely face heavy traffic, lane changes, and parking. Not as much highway, but lots of busy intersections.
- Metro East: Famous for tricky residential routes and lots of parallel parking. If you hate parking, this can be stressful.
- Other smaller centres: Some say rural centres are easier because traffic is lighter, but you may still face strict examiners.
The lesson here is not to chase the “easiest” centre. Instead, prepare for all conditions. That way, wherever you test, you are ready.
Real Student Stories
A student in Etobicoke passed because she handled the highway merge calmly, even though she was nervous. She checked mirrors, signaled, built speed, and merged without hesitation. The examiner told her it was one of the best merges he had seen that day.
Another student at Downsview failed because he rolled through a stop sign. He thought slowing down was enough. The examiner said, “No complete stop, no pass.”
At Metro East, a nervous student aced everything until the final parking. She parked too close to the curb, tapped it slightly, and failed. Brutal, but true.
Frequently Asked Questions
How long is the G2 road test?
It usually takes about 20 to 30 minutes. Enough time for the examiner to see how you handle real traffic and common driving tasks.
How many mistakes are allowed?
There isn’t a set number. Little slips are okay, but big safety mistakes, like running a stop sign or cutting someone off, can fail you.
Do I need to parallel park?
Most likely, yes. Parallel parking is a common part of the test, along with things like a three-point turn and regular parking.
Can I use a rental car?
Yes, but only if your name is on the rental agreement and the car has full insurance. The car also has to be safe to drive.
What if it rains or snows?
The test usually goes on. They only cancel if the weather is really bad. It helps to practice in rain or snow so you’re ready for anything.
Can I reschedule?
Yes, you can. Just make sure to do it at least 48 hours before your test or you’ll lose your fee.
Do examiners trick you?
Nope. They don’t set traps. They just want to see that you can drive safely and follow the rules.
Why Do Driving Schools Help?
Parents can teach you to drive, but they often pass down bad habits. A professional instructor at an MTO Approved Driving School in Toronto teaches the exact skills examiners want.
Many students at the Best Driving School in Toronto say mock tests helped them feel calm because they knew what to expect. Instructors know local routes and can simulate real test scenarios.
Final Thoughts
The G2 test isn’t about perfection. It is about showing that you can be trusted on the road. Focus on the basics: drive smoothly, check your blind spots, obey speed limits, and stay calm. Take your time, stay confident, and remember that examiners are looking for safe and responsible drivers, not someone who tries to show off.
When you pass, that first solo drive will feel amazing. Windows down, music playing, no one giving instructions or corrections, just you and the road. It is a moment of independence and freedom that makes all your practice and preparation worth it.
So the big question is, are you ready to step up, show what you have learned, and prove yourself as a capable driver?